Monitoring a grain dryer via the Internet
A relative of mine called a few months ago: “Hey, I have a grain dryer that I’d like to monitor from my phone. Is that something you could set up in time for harvest season?”
I have no idea how grain dryers work, especially not Internet-enabled grain dryers — because of course that’s a thing — but I figured I’d give it a shot anyway.
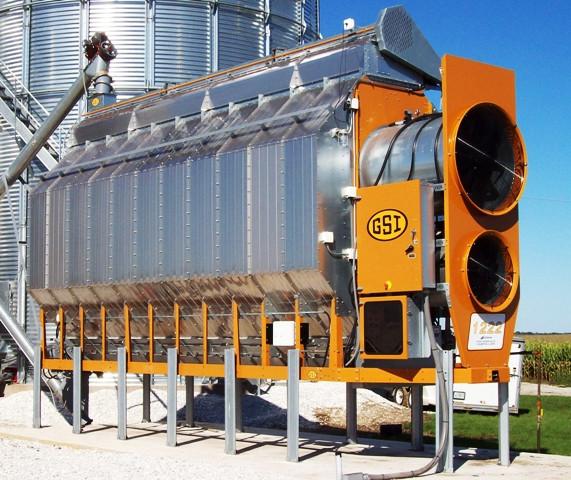
For context, a grain dryer is literally a combination of a huge furnace and fans that, you guessed it, dries harvested grain for optimal (lack of) moisture.
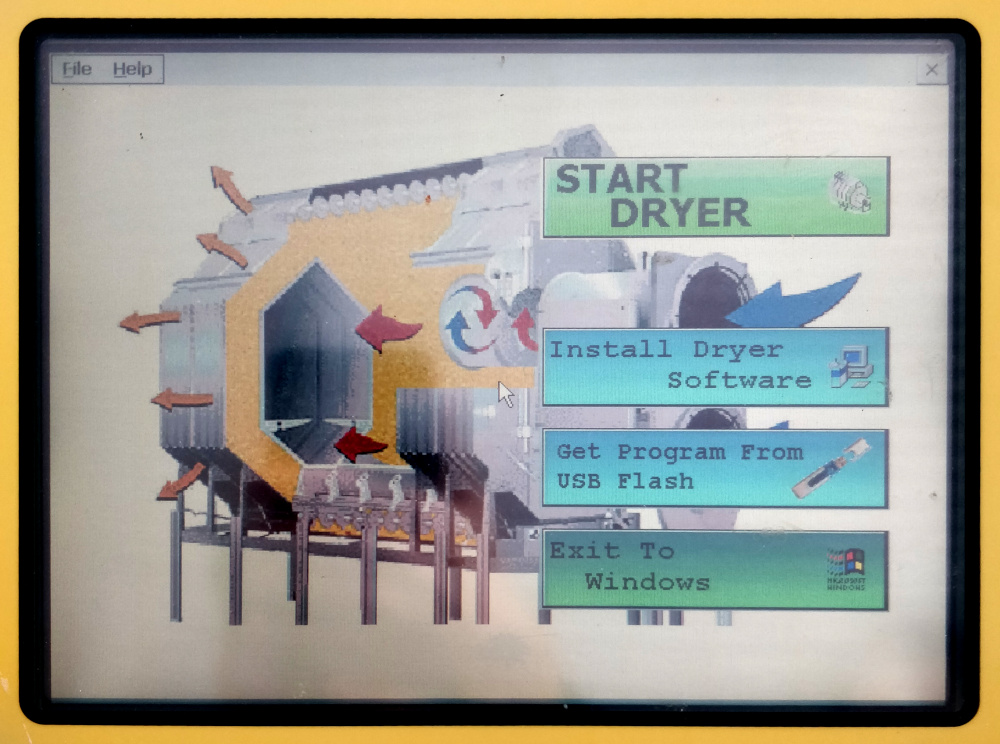
Such dryers typically have an embedded computer running some version of Windows and a touchscreen display that allows monitoring and controlling the dryer’s temperature, timers, and other parameters to get the perfect output.

However, because these things run for hours at a time, and because agriculture workers during harvest season usually end up in a sleep-deprived state that lasts for multiple weeks, having the ability to monitor these grain dryers remotely lets workers get more precious sleep time (instead of having to walk/drive up to the grain dryer to see if everything’s okay in the middle of the night).
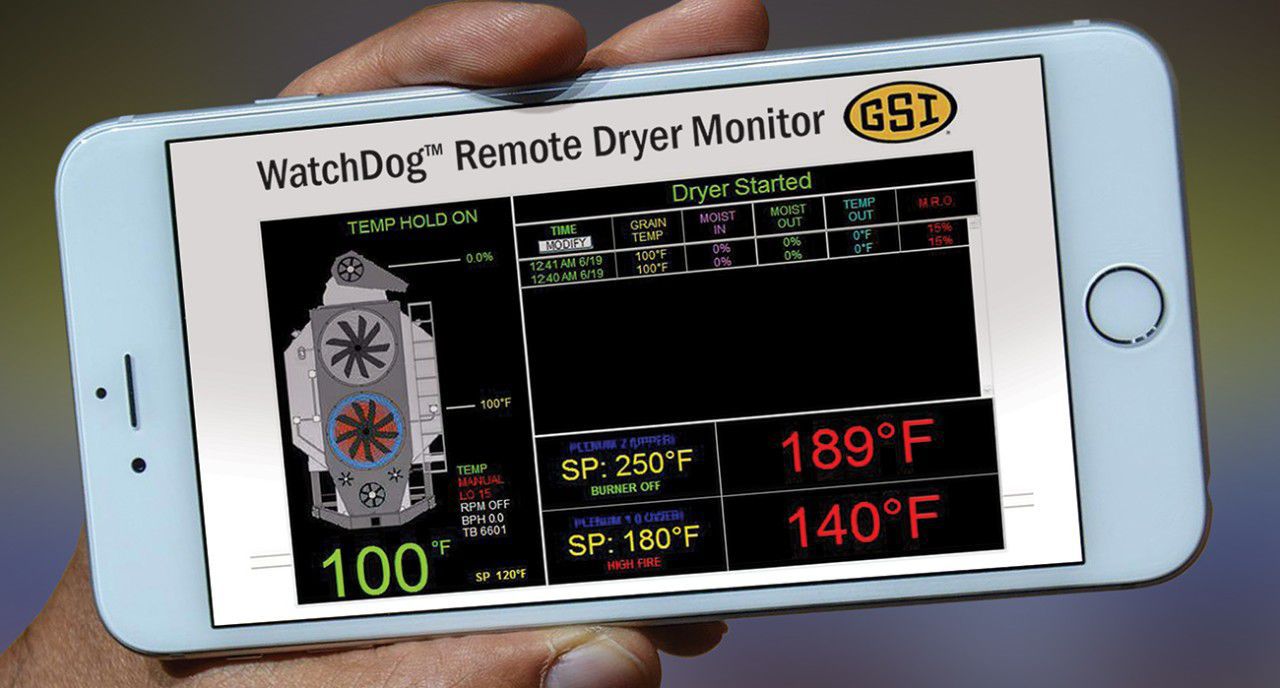
The desired outcome is to monitor the grain dryer remotely using the web interface:
It’s now harvest season 2020, so I connected a grain dryer to the Internet yesterday. It was fun (and weird) and I learned a few things. Here’s how we did it.
What you’ll need
- A GSI grain dryer with a Watchdog module installed (I was lucky that the dryer already had this module installed)
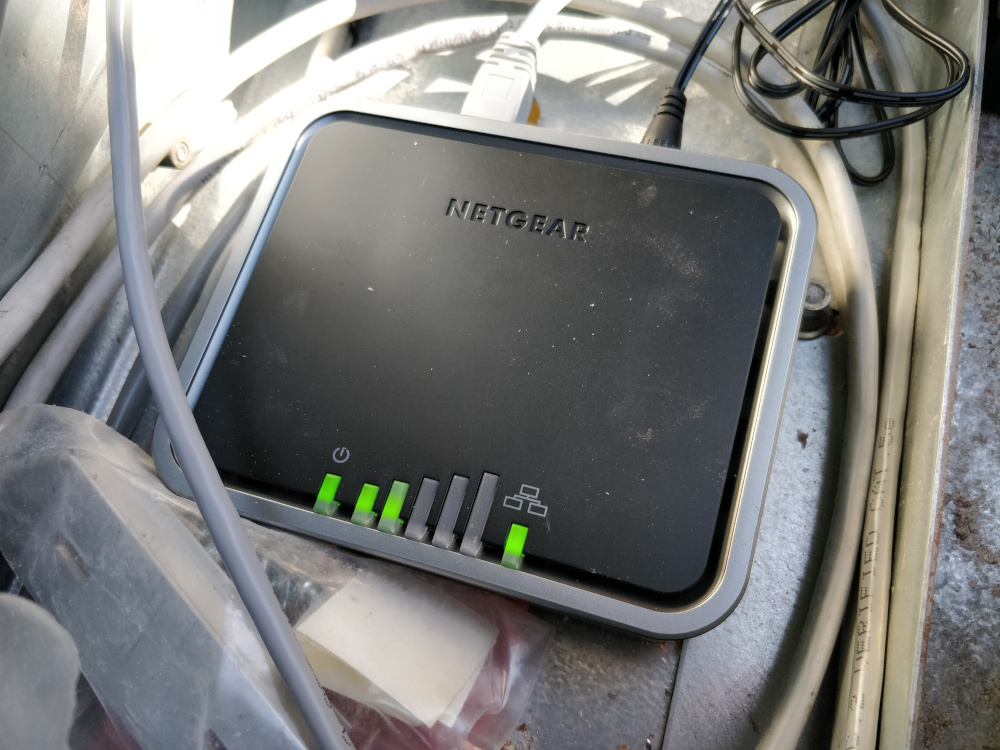
- A cellular modem (we purchased a Netgear LB1120)
- A cellular data plan with a public static IP (we went with Telus, a Canadian cellular carrier, and needed to open a business account to get access to a public static IP for 15$/month per month on top of the base data plan)
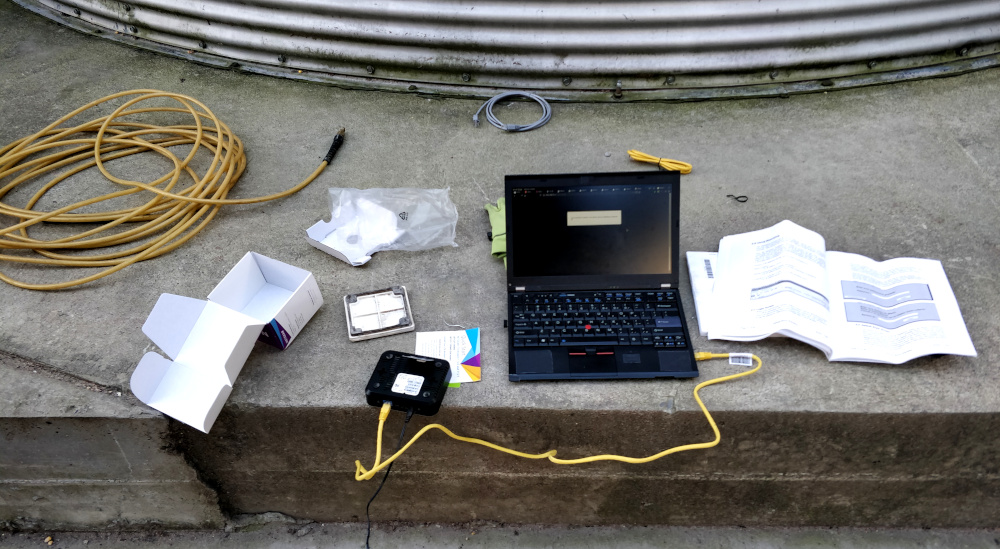
- A laptop with an Ethernet port
- A few Ethernet cables
Topology
Here’s how the network topology looks like:
                   (via public static IP)
                        +----------+
         +--------------> Internet <--------------+
         |              +----------+              |
 +-------v--------+                       +-------v-------+
 | Cellular modem |                       | Mobile device |
 +-------^--------+                       +---------------+
         |
+--------v----------+
|    Grain dryer    |
| (Watchdog module) |
+-------------------+
Essentially, we’ll expose the grain dryer’s web interface to the Internet via a public static IP using a cellular modem. Once it’s exposed, the operator will be able to navigate to that static IP from their mobile device to access the grain dryer’s web interface.
Subscribing for a data plan and a static IP
I called various cellular carriers here in Canada to learn more about their data-only plans and the possibility of adding a public static IP option to the plan: the only carrier that seemed like they knew what they were talking about was Telus. Others either didn’t offer the public static IP option, or didn’t know what I was talking about.
With that, we went ahead and signed up for a business account at Telus (required to get access to the public static IP option), bought a SIM card, and a data-only plan for the modem.
Setting up the cellular modem
First up, we need to make sure we’re able to connect to the nearest cellular tower to connect to the Internet. The Netgear LB1120 is fairly easy to set up on paper: pop a SIM card in there and we’re done, right? Well, for our use case, not quite. There are a few things to do to set it up to use the static IP assigned to the data plan from the cellular carrier. More importantly, the modem needs to be set up in “bridge” mode (instead of “router” mode) to act as a simple bridge (rather than a router) to connect it directly to the grain dryer.
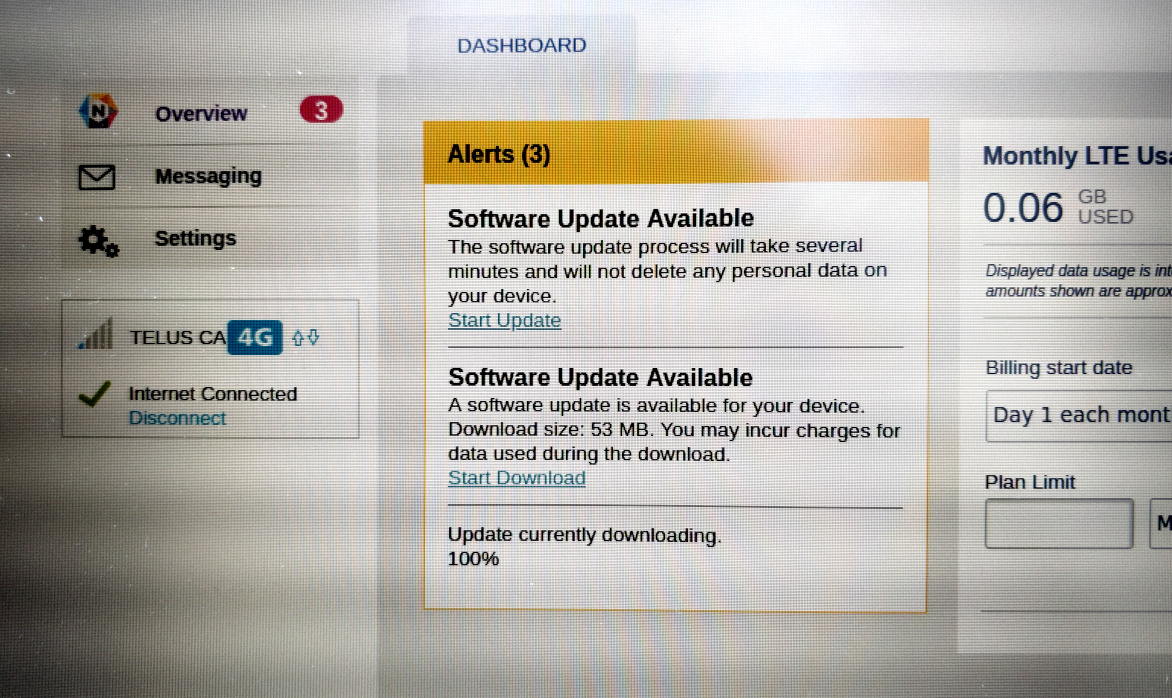
Days before arriving on the premises, I read online that the firmware that ships out of the box is broken: “bridge” mode doesn’t function at all, and an update is required to fix it. This made me a bit nervous because I didn’t have the modem with me, and wasn’t sure if I was going to be able to get the update to work properly. Thankfully, upon inserting the SIM card, turning the modem on, plugging it into the computer via an Ethernet cable, and accessing the modem’s setup interface at http://192.168.5.1, the modem’s web UI suggests downloading the latest firmware over the air. Neat!
From what I read, you must use a firmware more recent than NTG9X07C_12.09.05.27 to make sure “bridge” mode works fine. In our case, we updated to NTG9X07C_12.09.05.30, so we’re good.
Once the update completes and the modem reboots, we can go in the settings and change the operation mode to “bridge”:
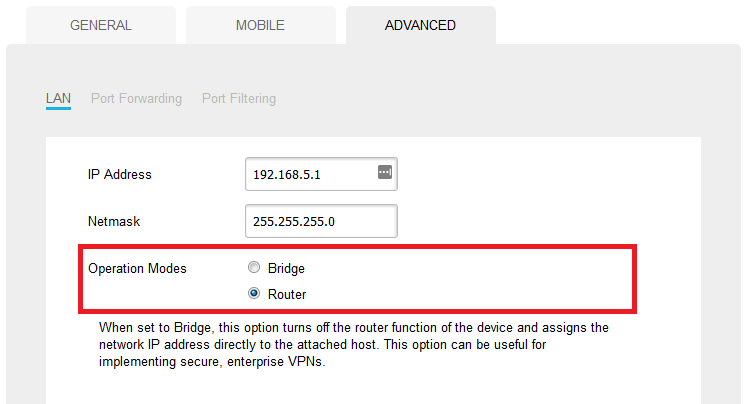
Doing so “turns off the router function of the device and assigns the network IP address directly to the attached host”, which is exactly what we need to connect the modem directly to the dryer’s Watchdog module. Save and let the modem reboot.
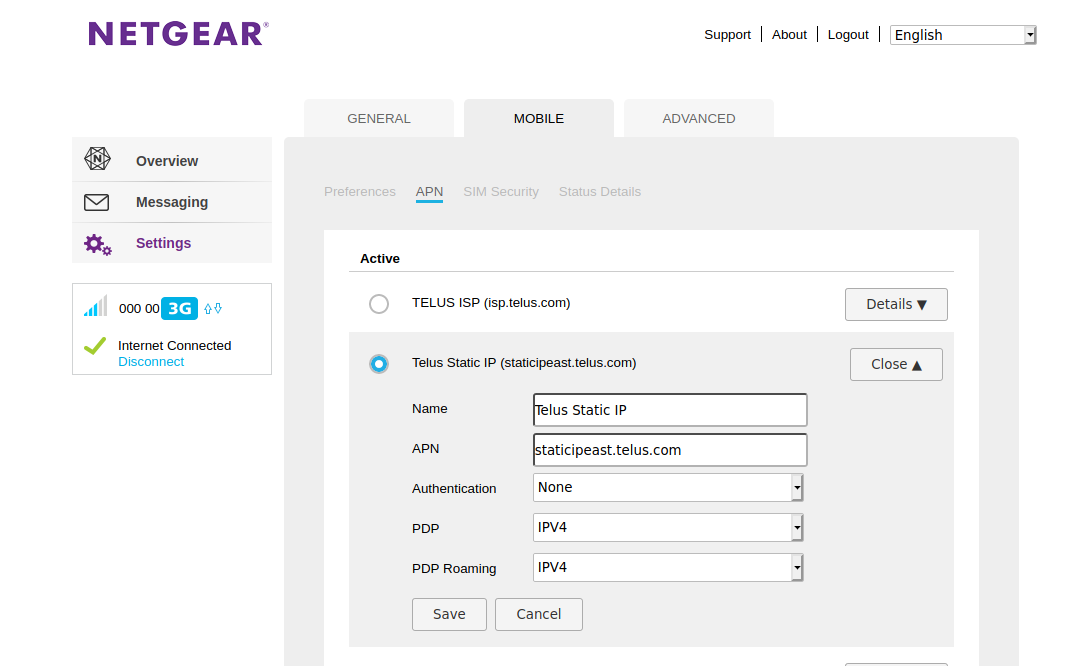
Now, the SIM is in the modem, which has the latest firmware and is in “bridge” mode, but there’s one last thing to fix: the cellular carrier is assigning a dynamic IP to the modem, which isn’t what we want: we should be getting the static IP for the data plan we’re paying for. To resolve this issue, we need to tweak the modem’s access point name (APN).
I got stuck on this issue for around 30 minutes before remembering that APNs are a thing and that I could possibly tweak it in the modem settings. I’m glad I remembered!
By default, the modem auto-detects the APN from the cellular carrier. For most cases, this works fine, but in this particular case, we want to use a different APN that allows us to use the static IP assigned to our data plan. APN settings vary by cellular carrier, and I ended up searching for Telus’ APN settings while on premise. I found USAT Corp’s website to include various APN settings, so I highly recommend trying those values out for your particular cellular carrier.
In our specific case, we needed to use the following settings to be able to get the static IP assigned to the modem:
- Access point name (APN):
staticipeast.telus.com(we’re on the east coast) - Authentication: None
- Packet data profile (PDP): IPv4
The LB1120 has a setting to automatically connect to the Internet upon booting: I recommend turning this on to have it connect automatically in the case of a power failure.
Let’s reboot the modem one more time. At this point, the modem should be using the static IP assigned to your data plan by the cellular carrier.
A tip to know if the modem is configured correctly: with the computer (device A) connected to the modem via Ethernet, use another device (device B) to access the expected static IP address (I used my smartphone). On device A, serve something (anything) on port 80 (I did sudo python -m SimpleHTTPServer 80), and see if you get that on device B when visiting the static IP address. If you do, then the modem is all set up and ready to go. If not, something’s wrong (invalid APN, incorrect data plan, no public static IP configured by the cellular carrier, some sort of NAT that prevents direct access, etc.).
Now that the modem is configured properly, let’s move on to configuring the grain dryer itself.
Configuring the dryer
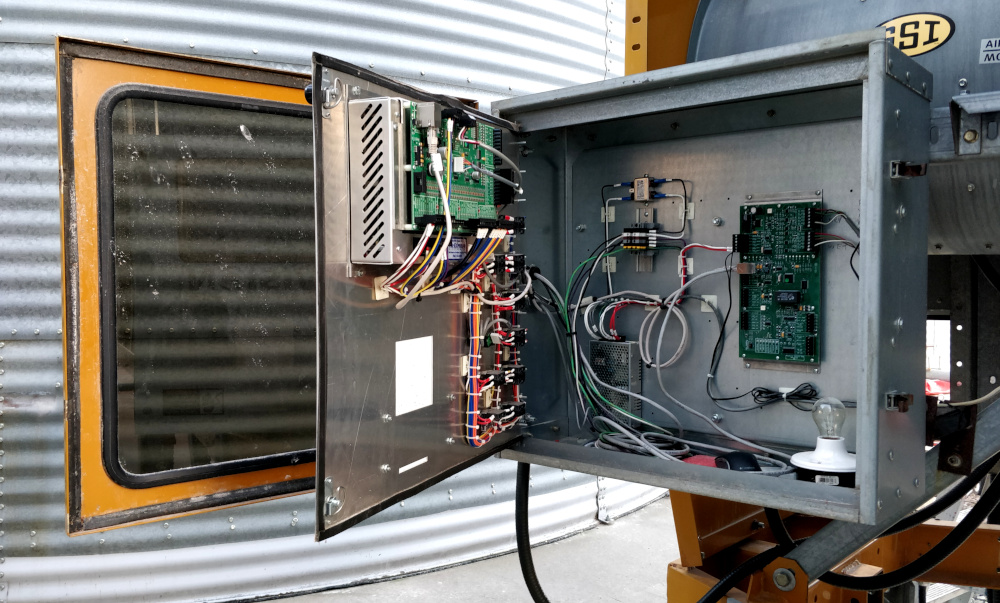
The process to configure the dryer is fairly similar to configuring the modem: we essentially connect the dryer to the laptop via Ethernet to configure it via a web interface. But first, let’s look inside the dryer’s computer compartment.
It all peels up like an onion: the outermost layer is the protective door to prevent water and debris from hitting switches and the touchscreen, and the middle layer is the computer and touchscreen itself along with a PLC. The Watchdog module is fixed inside the box itself.
When looking inside the box, the Watchdog module is fixed inside and connected to the rest of the PLC via an RS232 serial port. There are two Ethernet ports: one WAN port (the one on the left in the picture), and a LAN port (the one on the right).
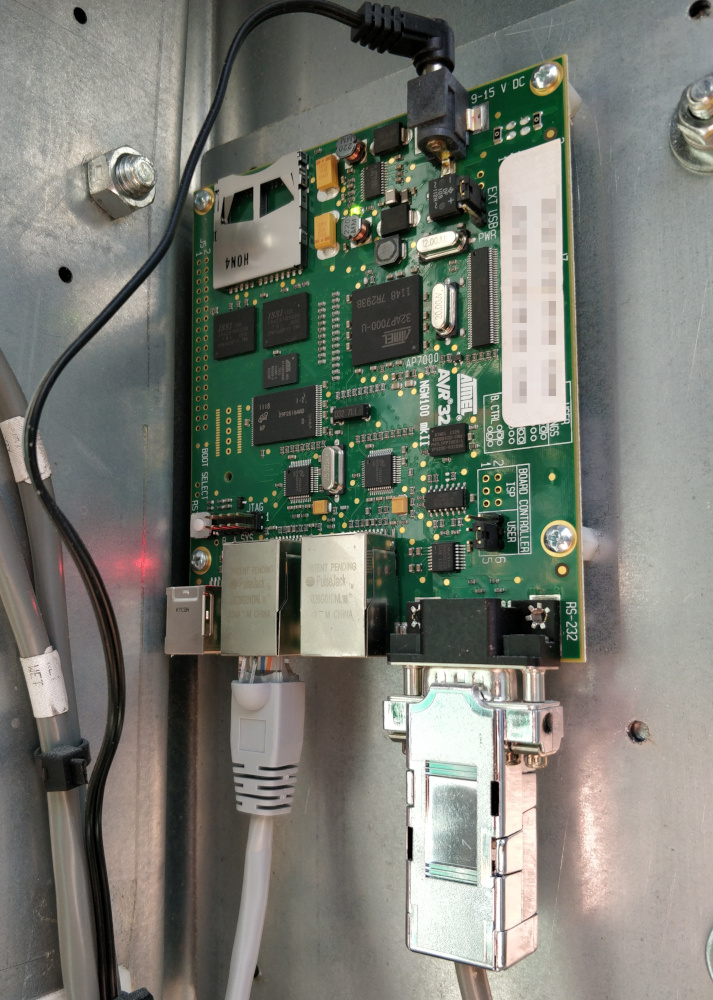
To configure the dryer’s network settings, we need to connect the Watchdog’s LAN port to the computer via Ethernet and access the web interface at http://10.0.0.1/setup. On this screen, you’ll need to click “Configure”, which will bring up the possibility to use DHCP or a static IP address. In our case, we select the “static IP” option.

On the next screen, we fill out the following fields:
- Static IP address
- Subnet mask
- Gateway
- DNS1
- DNS2
Assuming that the static IP address provided by the cellular carrier is 241.2.31.59, we’d fill out the fields as such:
- Static IP address:
241.2.31.59(static IP from the cellular carrier) - Subnet mask:
255.255.255.0(pretty standard stuff) - Gateway:
241.2.31.1(same as static IP, but last component is1) - DNS1:
241.2.31.1(we use the gateway as the DNS provider) - DNS2:
8.8.8.8(this is Google DNS, because why not)
Once that’s done, save the network configuration, and turn off the grain dryer.
You may now connect the modem to the Watchdog module’s WAN port (as pictured a few paragraphs above).
Now, the moment of truth: turn on the dryer. You may need to wait up to 3 minutes for the dryer and Watchdog to boot completely. A red LED should turn on near the WAN port once the Watchdog module is ready.
At this point, try accessing the static IP from your favourite device. If you did everything right, you should see the Watchdog web interface, and you’re done! 🎉
Questions and answers
Q: Why didn’t you just run a cable from the home to the dryer?
A: Because the dryer’s way too far from any building with Internet access. If only it had been so simple!
Q: Why pay for a static IP? Why not dynamic DNS or IPv6? Why not TeamViewer?
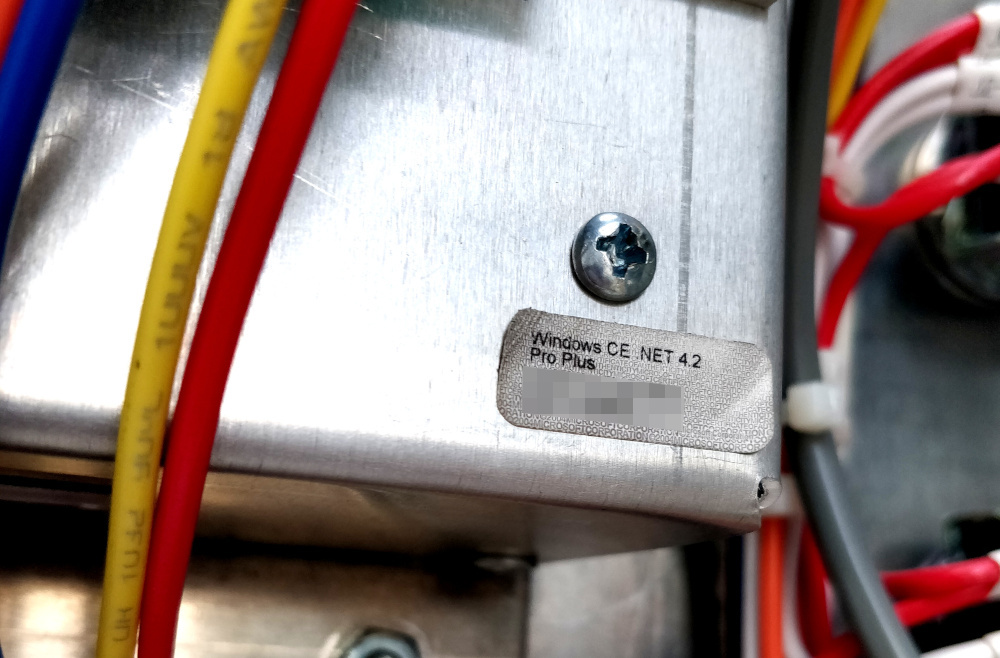
A: Telus (and others) do carrier-grade network address translation (CG-NAT), so there’s like a double layer of NAT going on. Using a public static IP bypasses this issue. What’s more, the modem itself doesn’t support dynamic DNS. Additionally, the dryer’s computer runs Windows CE .NET 4.2, so no IPv6 nor TeamViewer support. Heck, I even thought about installing ngrok on that thing, but Windows CE being what it is, I couldn’t.
Let’s wrap this up with a pair of nostalgia-inducing visuals: it appears that these dryers run on Windows CE .NET 4.2, which was released in April 2003. Time flies!