Building a fully static guestbook using Jekyll and Netlify
In this blog post, we’re implementing a no-JavaScript guestbook system for statically-generated websites with built-in spam protection. That’s right: no JavaScript involved. Just good old HTTP and HTML working together… with a bit of Netlify magic. The solution I’m presenting here is specific to Netlify and Jekyll, but I’m pretty sure you could port this to other service/tool combinations.
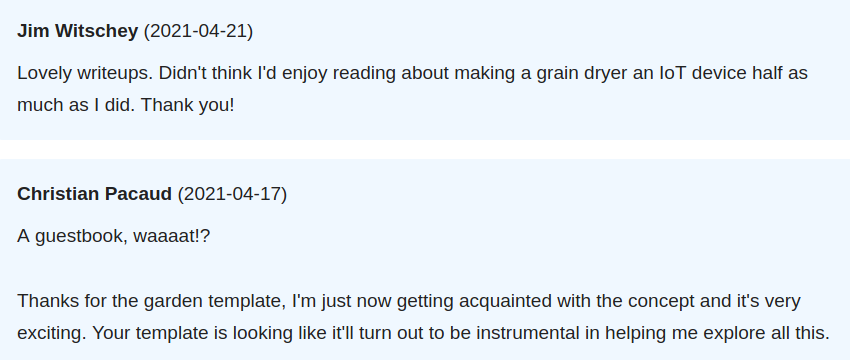
Sometime ago, I set out to build a guestbook for this website. I love the idea of a shared space where all visitors can share their experience and connect with others. An internet guestbook is like a hotel guestbook on steroids. Here’s an excerpt from my own guestbook (view the live guestbook here!):
I didn’t, however, want to move from the static website setup I had to a full-blown WordPress setup or anything that had a server-side backend that would unnecessarily make things more complicated and potentially lead to a worse experience. Additionally, I did not want the guestbook to rely on JavaScript, because I respect those who turn off JavaScript when browsing the Internet. The guestbook would need to work for everyone regardless of their web browsing preferences.
Lucky for us, we already solved this problem in the early 1990s: HTTP has a POST verb that a server can handle to receive data from the client. However, we run into another problem when considering that this is a static website (which is effectively just a bunch of HTML files linked together). There’s no dynamic back-end of any kind serving those HTML files to you: at the time of writing this, it’s all served straight from Netlify’s CDN.
So what do we do?
Well, this website was already off to a good start: it’s powered by Netlify, which offers an excellent Forms product, which provides an API. Once it’s set up, Netlify intercepts POST calls sent to a web page and runs logic in the background to store the contents of the form submission for later use via their API. In practice, this means that when someone goes on the guestbook and submits their comment using the form at the bottom of the page, Netlify intercepts the POST call and creates a database entry somewhere on their backend, which I can then query through their Forms API.
Note that when someone submits a comment on the guestbook, it doesn’t automatically show up on the guestbook page: this is because I manually moderate comments by pulling them from the Netlify Forms API myself and then re-generate the website.
The beauty in this workflow is two-fold:
- Read requests (regular GETs) to the site are still just static HTML files, so they remain super fast and easily cacheable across a CDN;
- There’s built-in comment moderation for me to weed out bad apples before the comments actually show up on the live guestbook.
Make sense? Let’s see how to implement this. I’ll assume you already have a Netlify account and a site set up there. If not, do that, and come back when you’re done.
Let’s start with the entrypoint: the actual HTML form itself.
1. Create an HTML form on your website
Netlify’s excellent “Forms setup” documentation page explains how to start using their Forms API: simply add an HTML form to your website, then publish it to the Internet. The first time someone fills out the form and submits it, you’ll get an email, and see your form created in the Forms section of your site in the Netlify admin panel. It’s that easy.
Here’s the HTML form I added on my own guestbook page (view source on GitHub):
<div>
  <h2>Sign the guestbook</h2>

  <form action="/submitted" name="guestbook" netlify netlify-honeypot="not-for-humans">
    <p style="display: none;">
      <label>Don’t fill this out if you're human: <input name="not-for-humans" /></label>
    </p>
    <p>
      <label>Name<br><input placeholder="Your name..." type="text" name="name" /></label>
    </p>
    <p>
      <label>Message<br><textarea name="message" placeholder="Your message..."></textarea></label>
    </p>
    <p>
      <button type="submit">Submit</button>
    </p>
  </form>
</div>
Notice these few key points:
- The
netlifyattribute in theformtag is what tells Netlify to actually care about this form. Without this, Netlify wouldn’t track submissions to this form. - There’s a honeypot field in the form (
not-for-humans). This field is not shown to humans browsing the page, so it should always be empty. However, bots tend to fill out all fields, so Netlify knows that if this field is not empty, it’s almost certainly a spam submission, so it knows it can simply ignore it. - The form
nameattribute (in this case,guestbook) is the identifier of the form, which you’ll see appear in the Netlify admin panel later when submissions start coming in.
Once you have added this form to your site, publish it to the Internet, and submit the form on your live site to test it out. If all goes well, Netlify will give a success response. You can customize this success page by adding a Jekyll page at the /submitted permalink URL, similar to what I’m doing on this website.
We now have a way to receive submissions from people browsing our website. Let’s now see how to pull these submissions from the Netlify Forms API and into our Jekyll website.
2. Fetch form submissions via the Netlify Forms API
I wrote a Ruby script (not very clean, PRs welcome!) that talks to the Netlify Forms API and pulls form submissions into a YAML file that Jekyll reads when generating the static site. You can download the script from my repository on GitHub.
You’ll need to install the HTTParty gem (gem install httparty) and replace three values in the file (keep those values secret, don’t commit them to a public repository!):
-
NETLIFY_PERSONAL_ACCESS_TOKEN: you can generate a personal access token in your Netlify settings. -
NETLIFY_SITE_ID: you can find this ID by going in your Netlify site settings (Site information ➞ API ID). -
NETLIFY_FORM_ID: you can find this ID by going in the Forms section of your Netlify site, clicking on the form in the list, and copying the last part of the URL (/sites/<site_name>/forms/<FORM_ID>).
Before running the script however, make sure to create a _data/ directory in your Jekyll site, and inside of it, an empty guestbook_messages.yml file; this is where the script will write form submissions to for Jekyll to use when generating the site.
Once you’re done, run the script with ruby update_guestbook.rb. This should pull form submissions from the Netlify Forms API and write the entries to your site’s _data/guestbook_messages.yml file. Here’s how the file looks like in my own repository.
At this point, there’s only one step left: showing the form submissions in the _data/guestbook_messages.yml on your site.
3. Display guestbook submissions
To show the entries from the YAML file on your site, add this snippet where you’d like to show the messages:
{% for message in site.data.guestbook_messages reversed %}
  <div>
    <div><span style="font-weight: bold;">{{ message.author }}</span> ({{ message.timestamp | date: "%Y-%m-%d" }})</div>
    <div>{{ message.body }}</div>
  </div>
{% endfor %}
At this point, your site should show the entries in the YAML file that the Ruby script wrote to after fetching the form submissions from the Netlify Forms API.
All you need to do now is to generate your static site and upload it somewhere on the Internet.
The next time someone sends a form submission on your site, you’ll get an email from Netlify, after which you can run the Ruby script to moderate the comment, and if it’s acceptable, commit the changes, then push them to Netlify to update your site. In the event that you don’t want to show a specific form submission on your site, log in to your Netlify admin panel, go to your site’s Forms section, open the form, then delete the entry.
A potential next step could be to extend this to every single blog post to effectively create a commenting system (rather than a single guestbook page)… but that’s for another time.